
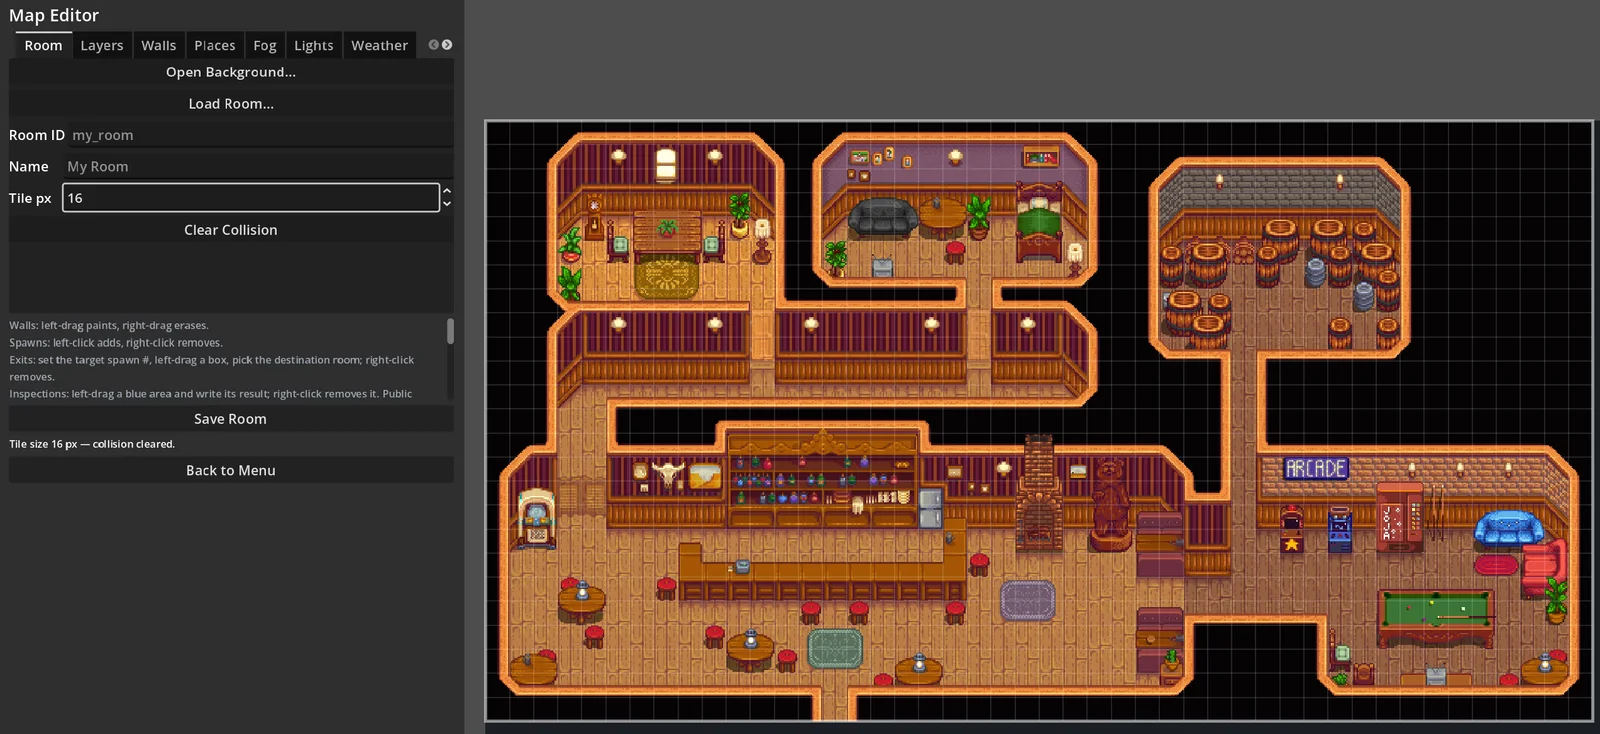
The initial room consists of one flat background image. The editor is then used to identify blocked areas, arrival locations, exit destinations, and regions that users may inspect or activate.
Preparation
Complete the following steps before collision or room data is added.
- Select suitable artwork. Confirm that the artwork may be used for the intended purpose. Record its tile dimensions when available. Common tile dimensions are 16 × 16, 32 × 32, and 48 × 48 pixels.
- Assemble the map image. Use an image editor to prepare the complete map. Provide sufficient passage width for character sprites and align important boundaries with the intended grid.
- Export a flat image. PNG is recommended for pixel art and images that use transparency. JPG and WebP are also supported. Image dimensions that are exact multiples of the tile dimensions produce a uniform grid.
- Open the background. From the Blarp main menu, select Map Editor → Open Background….
Note: Do not include player or NPC sprites in the background image. Blarp renders character sprites separately. Decorative objects may be included, but objects that characters pass behind may require separate layering and precise collision.
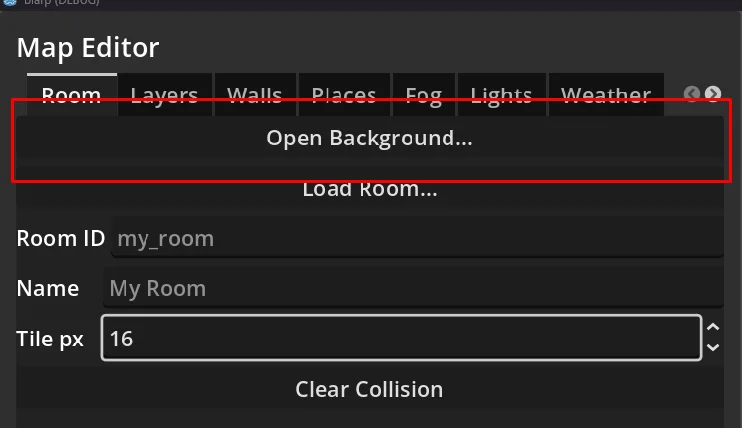
Room Configuration
Assign the following values before painting collision.
- Room ID: Assign a stable internal identifier and folder name, such as
town_squareorDR_Church. Use letters, digits, and underscores without spaces. Because exits reference this value, do not change it after rooms have been connected. - Name: Enter the room name displayed to users.
- Tile px: Enter the grid dimension used for tile collision and tactical combat.
Caution: Set Tile px before painting. A later change resets tile collision and the free-roam mask because it changes the grid geometry.
Viewport Controls
- Middle-drag: Moves the view across the map.
- Mouse wheel: Changes magnification around the pointer.
- Show Grid: Shows or hides the grid lines and border.
- Show Walls: Shows or hides the red tile-collision overlay.
- Show Mask: Shows or hides the yellow free-roam overlay.
Tile Collision
Select Walls to edit tile collision. The red overlay identifies grid tiles that cannot be entered.
- Left-drag: Adds blocked tiles.
- Right-drag: Removes blocked tiles.
- Clear Collision: Removes all blocked tiles.
Caution: Block the perimeter of the map before detailed collision is added. An open edge permits users to move outside the background image.
Free-Roam Collision Mask
Tile collision cannot closely follow curves, diagonal paths, or angled objects. A free-roam mask provides per-pixel collision for these features. Create the mask as follows:
- Paint the required tile walls.
- Select Seed from Walls.
- Select Free Draw or Free Rect.
- Modify the yellow mask until it follows the artwork.
- The Brush slider changes the radius of the Free Draw tool.
- Left-drag adds mask collision. Right-drag removes mask collision.
Ctrl+Zalternates the most recent stroke between its applied and reverted states.- Clear Mask removes all mask collision but retains the mask layer. No Mask removes the mask layer and returns free-roam collision control to the tile walls.
Caution: When a free-roam mask is installed, it replaces tile collision during free-roam operation; the two layers are not combined. Combat movement continues to use tile collision.
Spawn Points
Select Spawns under Places. Left-click to place a spawn point at the center of a tile. Right-click to remove the nearest spawn point.
- Spawn 0 is the default arrival point.
- Spawns 1 and higher provide specific arrival targets for exits from other rooms.
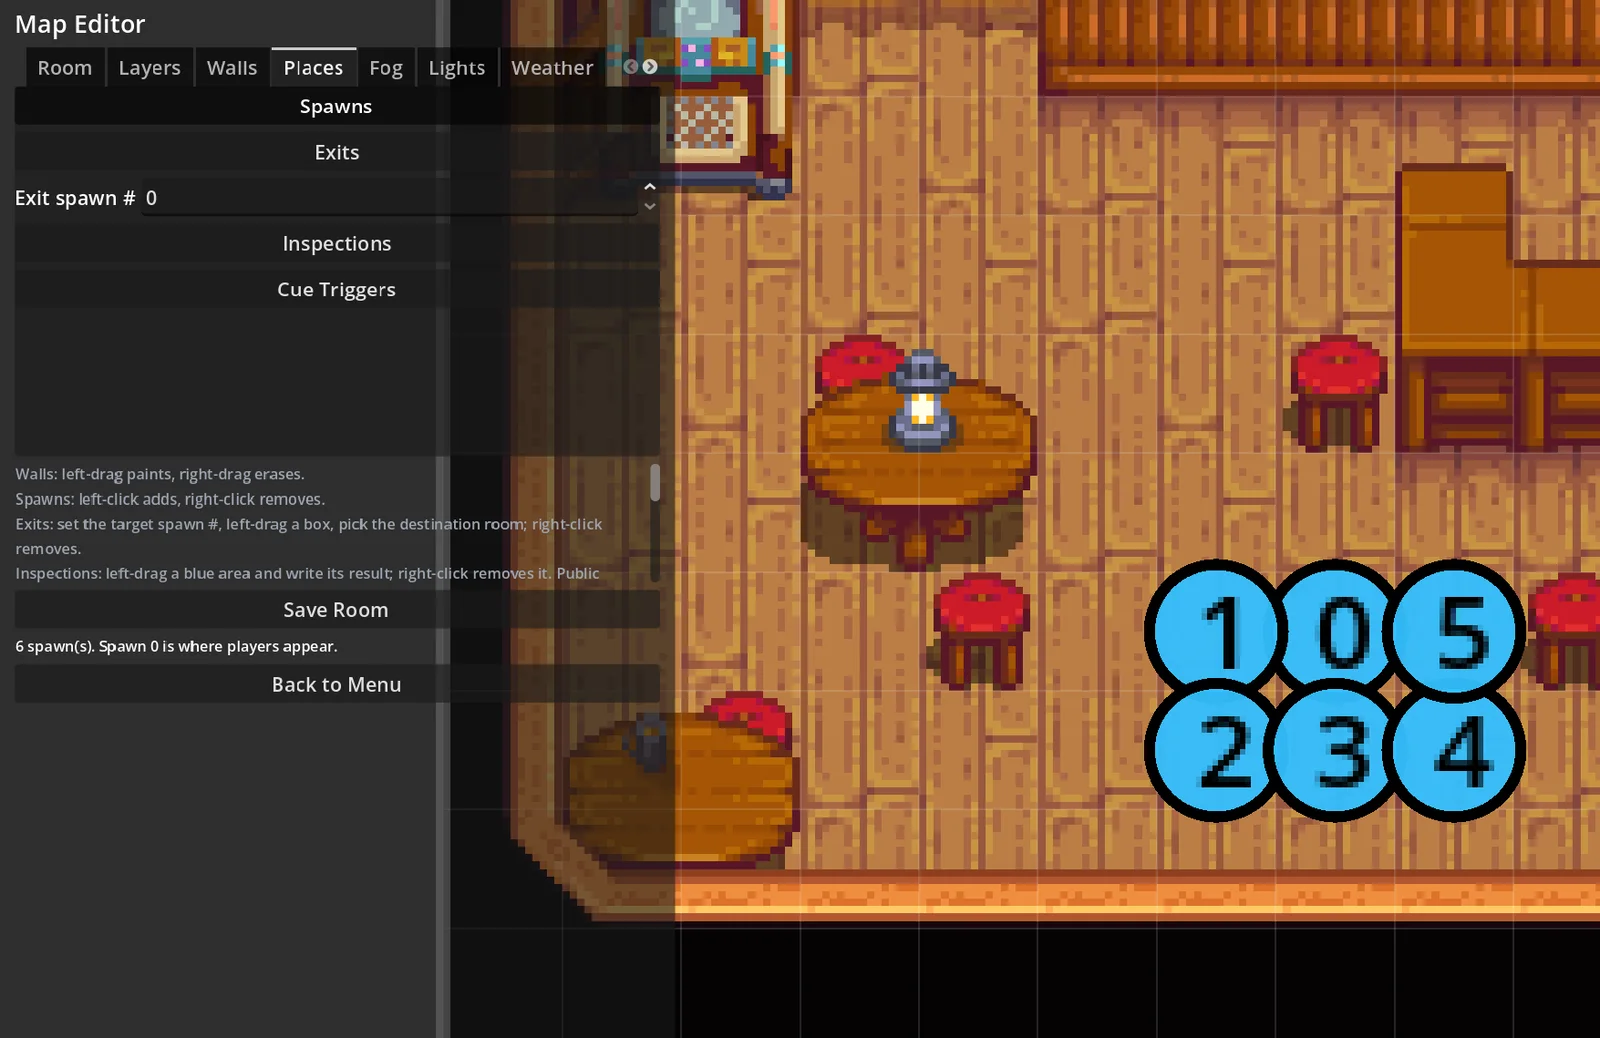
Caution: If a room is saved without a spawn point, Blarp creates one at the center of the image. The automatic point may be inside collision. Place and inspect Spawn 0 before saving the room.
Room Exits
Save the destination room before creating an exit. A room does not appear in the destination list until it has been saved.
- Select Exits and enter the destination fallback spawn number.
- Left-drag a region over the doorway, stairs, or other transition area.
- Select the destination room.
- When the editor opens the destination room, left-click the required arrival tile to create a spawn point.
- After the editor returns to the source room, select Save Room.
Caution: If the source room is closed without being saved, the exit is lost while the destination room retains the new spawn point. During arrival placement, press Esc or right-click to use the selected fallback spawn without creating another point.
Inspection Regions
An inspection is a blue region that provides in-character descriptive information when a user right-clicks it.
- Select Inspections.
- Left-drag a region over the applicable object or area.
- Enter the information revealed by the inspection.
- Select whether the result is public.
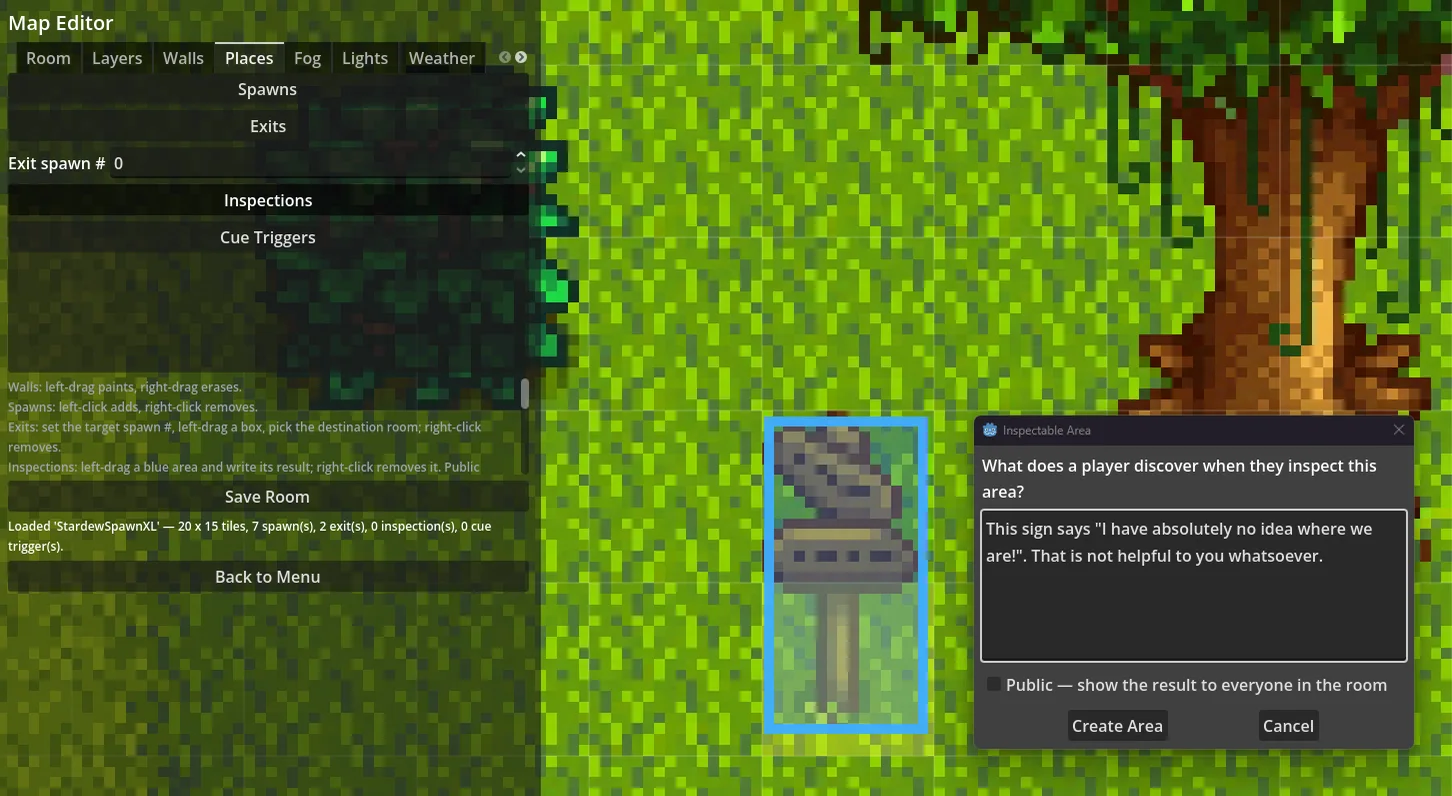
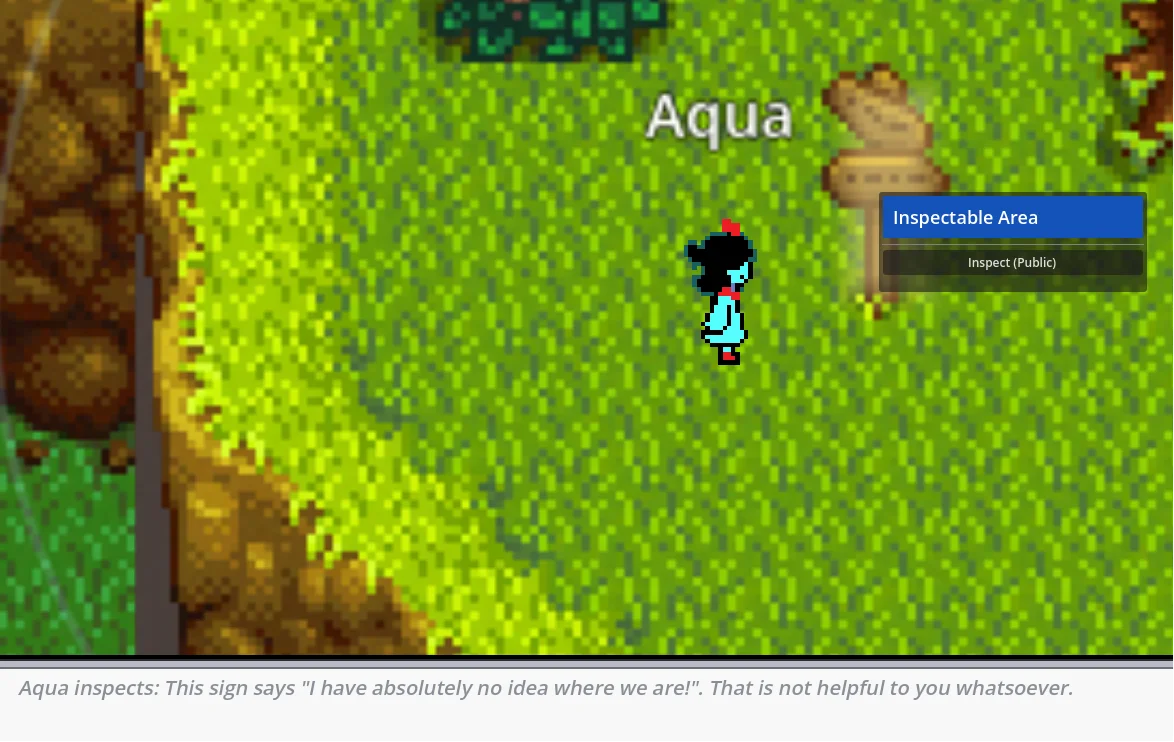
To remove an inspection, select the Inspections tool and right-click inside the blue region.
Cue Trigger Regions
A cue trigger is a purple region that executes a scripted GM cue when a user interacts with it. The cue must be created and saved on the server before the trigger is configured.
- Log in as a GM, select the cue in the GM panel, and select Copy Trigger ID.
- In the Map Editor, select Cue Triggers.
- Left-drag a region over the applicable object or interaction area.
- Enter the action prompt, paste the trigger ID, set the cooldown, and create the trigger.
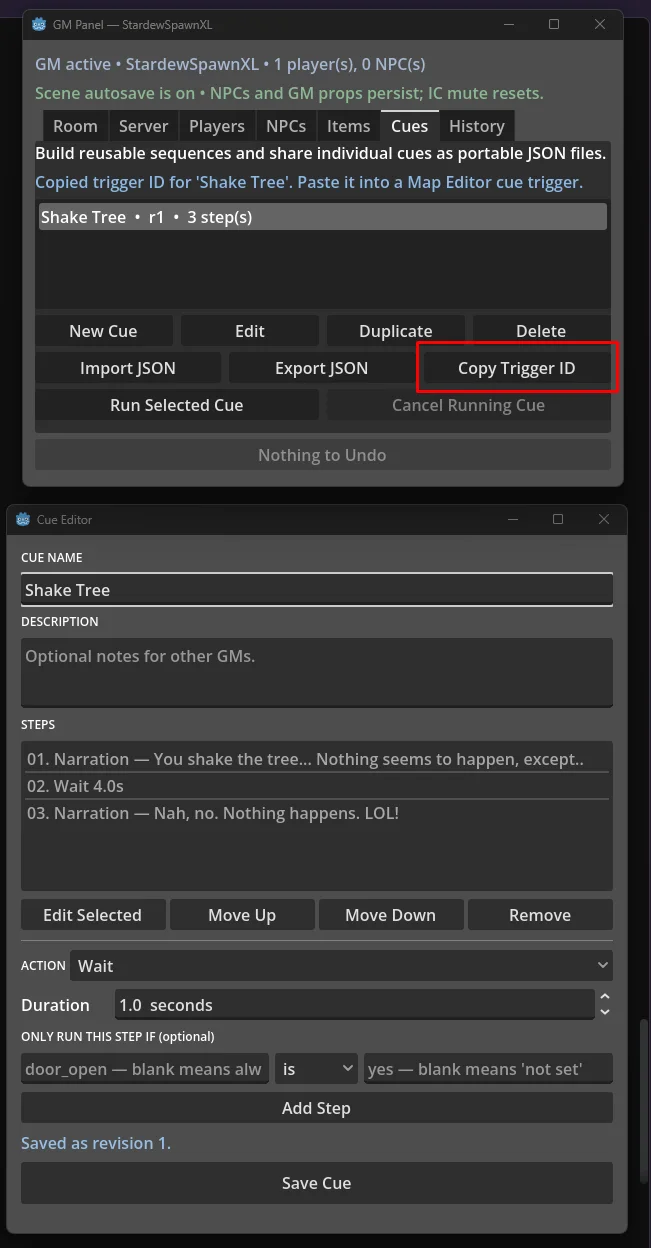
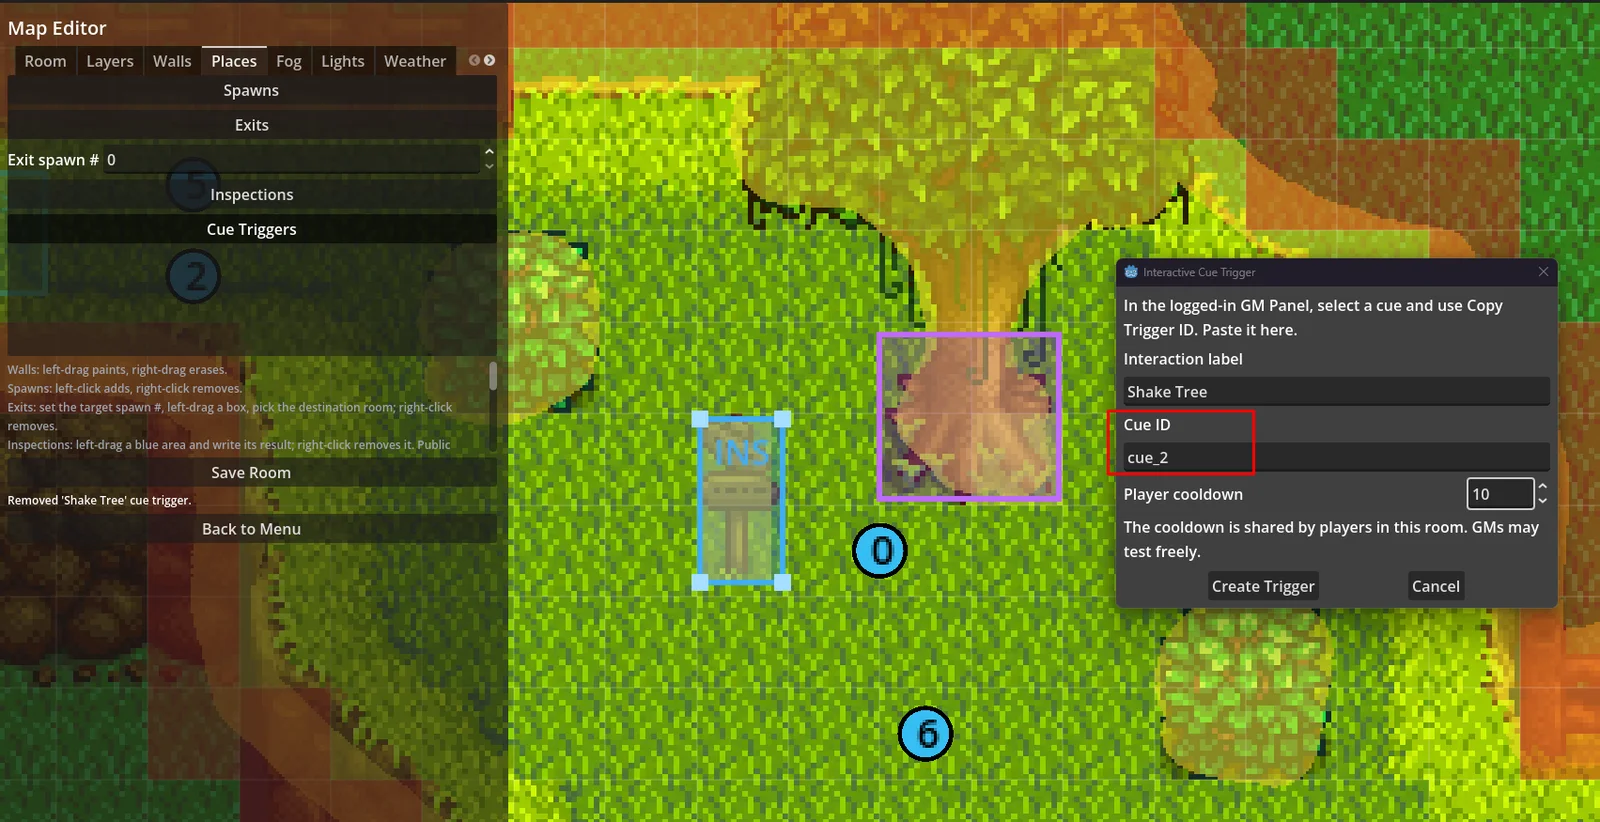
- A cooldown applies to all users in the room. GMs may bypass the cooldown during testing.
- To remove a cue trigger, right-click inside its purple region.
- The running server must have both the saved cue and the updated room files before a non-GM user can activate the trigger.
Background and Parallax Layers

Select Add Background Layer… to add sky, distant scenery, fog, clouds, or other artwork behind the main map.
- The item at the top of the layer list is nearest the front. Drag items to change their order.
- A parallax value of
1.00follows map movement. A value of0.00remains fixed to the viewport. Intermediate values produce apparent depth. - Horizontal and Vertical repeat the layer along the selected axis.
- The main map must contain transparent areas for a background layer to remain visible.
Saving and Operational Testing
Save Room writes the imported background, collision image, room definition, optional free-roam mask, and parallax files to content/rooms/<room_id>/. Use Load Room… to open an installed room for revision.
If the room is open in a connected client, save the changes and select File → Refresh to load the revised files.
Final Inspection Checklist
- Verify that the room ID is unique and stable and that the tile dimension matches the artwork.
- Verify that Spawn 0 is clear of collision and that all solid objects and map edges are blocked.
- Verify that the free-roam mask was seeded before refinement or was intentionally omitted.
- Verify that each exit reaches the correct room and arrival spawn.
- Verify that inspections contain complete in-character text and that cue triggers reference saved cues.
- Verify that parallax layers are in the required order and do not produce visible seams.
- Verify that the source room was saved after the final change.
- Test free-roam movement, the map perimeter, each exit, and operation with a second user when possible.